ePEN2 Help
Contents
![]()
Navigation
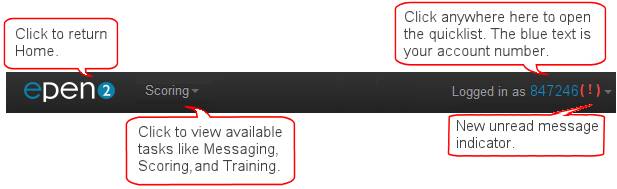
The Navbar is available everywhere you go in ePEN except when scoring. From here you can access all of your tasks
and find some quick shortcuts to frequently used functions. Note that the
tasks available under the Scoring menu will change as you advance through the
training process and into scoring.
|
|
|
|
|
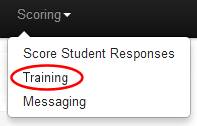
Training
Training is available under the Scoring menu. To access training
click the Training option. This will
automatically log you out of ePEN and launch the ePEN training site. Follow the instructions provided on the training home screen to
access the courses available to you. When you have completed training, click the provided Exit button and
you will be taken to the ePEN log in screen. |
|
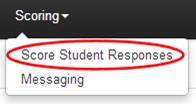
Scoring
To score responses, click the Scoring menu on the navbar and select Score Student Responses. This launches the scoring viewer. If there are no responses available to score, or if you run out of responses to score, you will see a message indicating that there is no work available. |
|
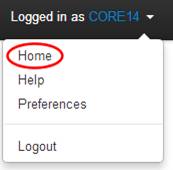
Home Screen
There are two ways to return to the Home screen. · Click the ePEN logo at the upper left · You can also select ‘Home’ from the quicklist.
|
|
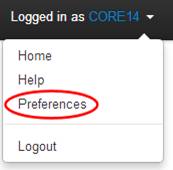
Preferences
The Preferences quicklist option opens the preferences screen where you can update your email and phone number and change your password. |
|
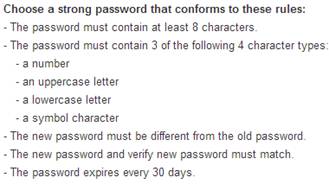
Change Password
You can update your password using the fields in the Change Password section of the Preferences screen. Be sure to follow the strong password rules. You’ll have to provide your current password once and your new password twice. |
|
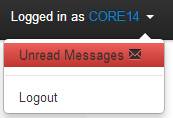
Logout
To log out of ePEN, click the quicklist and select ‘Logout’. It’s always a good idea to log out of the system when you’re done using ePEN. |
|
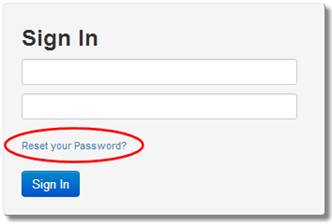
Forgotten Password
If you forget your password, just click on the Reset your Password? link on the sign in screen. Once you supply your email address and account number, an email will be sent to you with instructions on resetting your password. You must provide the email address you have on record with ePEN. |
|

Performance Peek
Report
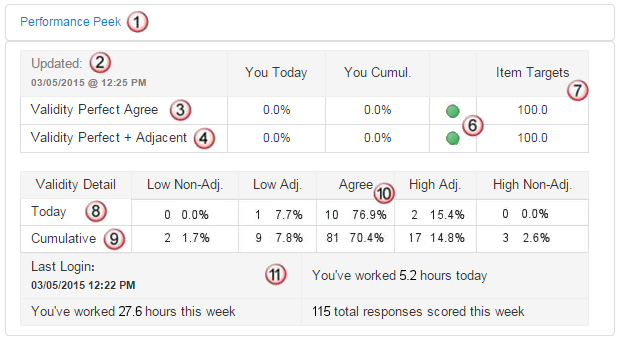
The Performance Peek report allows you to see how you’re performing and how much time you have been scoring for the day and the week. |
|
|
|
|
|
|
When you access your Home screen the Performance Peek report appears in collapsed mode. To open it, simply click the report name and it expands. |
|
|
The statistics and information presented in the report update frequently. The last update time is presented at the upper left of the report. |
|
|
Your validity perfect agreement percentage is presented for both the current day (in the ‘You Today’ column) and for your cumulative scoring history since you began scoring the assignment (in the ‘You Cumul.’ column). You want to keep your current and cumulative validity agreement value at or above the value that appears in the Item Targets column. |
|
|
Your validity perfect + adjacent agreement percentages are presented for both the current day (in the You Today column) and for your cumulative scoring history since you began scoring the assignment (in the You Cumul. column). |
|
|
If you’re scoring a single trait assignment you will usually see ‘Overall’ in this row. If the assignment you are scoring has more than one trait, each trait appears in its own row of the report and performance statistics will appear for each trait. |
|
|
A small colored icon appears between your performance columns and the Item Targets column to provide a visual indicator of your performance. · Green is displayed when you are 3 or more percentage points above the target. · Yellow displays when you are plus or minus two percentage points of the target. · Red displays when you are three or more percentage points below the target. |
|
|
The project establishes validity target percentages that they want each scorer to meet or exceed when they score. These targets are presented in the Item Targets column. |
|
|
|
|
|
The second table in the Performance Peek report shows you detailed information about your validity performance. The first and second rows show your validity performance for the current day. |
|
|
The third and fourth rows show your cumulative validity performance for all validity papers you submitted for the assignment. The cell backgrounds will turn red any time your performance falls below the validity agreement and validity + adjacent agreement targets set for the assignment. |
|
|
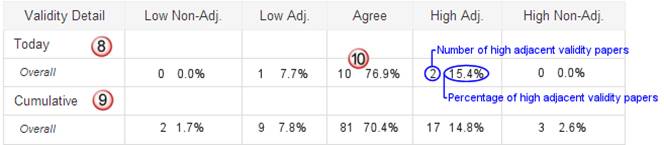
Each column of the validity detail table shows you the number of validity papers you scored that matched the adjacency value displayed in the column header. For example, the sample report above indicates that today the scorer scored 10 validity papers with perfect agreement. They scored 1 paper adjacent low and 2 papers adjacent high to the true score. |
|
|
|
|
|
At the bottom of the Performance Peek report is some additional information about your time on the system. The week begins Sunday at midnight. |

Messaging
|
||
|
The
Messaging task will be familiar to
anyone that has used email but it functions only as an internal ePEN
messaging system. There are some significant differences between email and
ePEN messaging. ·
When
you receive a message while you’re scoring, the system will end your scoring
session and return you to the Home screen to retrieve the message. This ensures timely interactions with your
supervisors for getting questions
answered and issues resolved. ·
You
can’t score student responses until you have read all the unread messages in
your inbox. ·
Messaging
contains all messages sent to you from all assignments since your user
account was created. Messages that you send show your account number in
the From column; messages you receive display the assignment name in the From
column.
·
Messaging
displays all messages sent to you from Messaging, Review and Backreading;
messages sent via automated processes (like Scorer Exception) can also be viewed in Messaging.
·
When
you have unread messages, a red exclamation point appears in the
quicklist: |
||
|
||
|
|
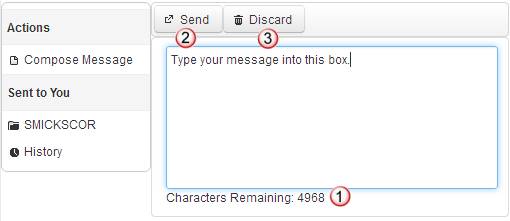
When you create a message
(by clicking ‘Compose Message’) the message
you send goes to the inbox of your current active assignment rather than to an individual. The assignment mailbox is monitored by
multiple people, so any one of them can respond. You’re
likely to get a response to your message more quickly than you would
if you sent your message to an individual supervisor. |
|
|
|
A ‘Characters Remaining’
counter appears at the bottom of the message and counts down as you
type. Maximum message size is 5000
characters.
|
|
|
|
Click the Send button to
send the message. |
|
|
|
You can discard a message
by clicking the Discard button and confirming. |
|
|
|
Replying to a message works
exactly like composing a message. |
|
The
Inbox
|
||
|
|
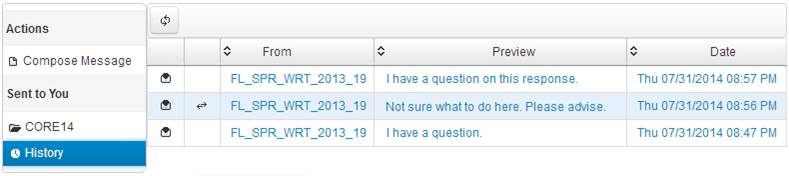
To view messages in your inbox, click your account number
on the left under Sent to You. |
|
|
|
Read messages are indicated by an open envelope icon,
unread messages show a closed envelope and a bold font. |
|
|
|
When you receive a reply to a message, the sender is
identified as the assignment rather than the individual that sent the
reply; the assignment name appears in the From column. |
|
|
|
A 50 character preview of the message contents is provided
in the Preview column. |
|
|
|
By default messages are
sorted chronologically. The inbox can be sorted chronologically and by several
other criteria by clicking the column headers. |
|
History
|
||
|
·
Messages
are automatically moved into the History view 5 days after they have been
read. ·
Unread
messages remain in your Inbox until you read them. ·
When
you reply to a message the reply immediately appears in the History
view. A message that you replied to is
indicated in the second column with this icon: ·
By
default messages are sorted chronologically. The inbox can be sorted by
several other criteria by clicking the column headers. |
||
|
|
|
|